
How to Create an Obituary Card Online for Free
When you're trying to create an obituary card online free, the last thing you need is software that demands a subscription or a design degree. You have a funeral to plan, family to call, and a deadline that won't wait. Most tools online either lock the good templates behind a paywall or make you download bulky design programs just to add a photo and a few lines of text.
This guide shows you exactly how to build a printable obituary card without spending a dime or fighting confusing software. You'll pick a layout that fits your loved one's story, add their photo and dates, write a short life summary, and export something you can print at home or take to a copy shop. No trial periods, no hidden fees, no credit card required.
Beyond the card itself, we'll also cover how to turn that same information into a lasting online memorial your family can visit anytime, not just on the day of the service. That way the printed card in someone's pocket connects to a fuller tribute online, complete with photos, a guestbook, and even a QR code for the headstone or funeral program.
What you need before creating an obituary card
Before you open any template tool, spend ten minutes gathering the raw materials, the same way you would work through the first steps after a death. Trying to hunt down a birth certificate or a decent photo while you're mid-edit slows everything down and adds stress you don't need. Gathering everything upfront turns a stressful afternoon into a thirty-minute task, and it means you won't have to reopen the design later to fix a misspelled name or a missing date.
Gather the essential details
Start with a simple checklist so nothing gets left out. Most obituary cards follow a similar structure, so having these details ready lets you move through the template fast:
- Full legal name and any nickname they went by
- Date of birth and date of passing
- City or town where they were born and where they passed
- Names of surviving family members (spouse, children, grandchildren)
- Funeral or memorial service date, time, and location
- A favorite Bible verse, poem, or quote, if you want to include one
- One or two sentences that capture who they were
Writing this list out first means the actual card design step becomes a matter of filling in blanks, not scrambling for facts under deadline pressure.
Choose the right photo
Photos make or break a printed card. A blurry phone screenshot looks fine on a screen but turns pixelated the moment it's printed at even a modest size. Look through phone galleries, old albums, or ask relatives for a high-resolution image, ideally at least 1000 pixels wide, and set the extras aside for other ways to honor them with photos later. A recent, well-lit photo where their face is clearly visible works better than an old, low-quality scan, even if the scan is more sentimental. If you only have an older printed photo, a quick scan at 300 DPI on a home scanner or a photo center like a local pharmacy will give you a file clean enough for print.

A good photo and accurate dates matter more than any design flourish you add later.
Decide how and where you'll print
You don't need a printing press to make cards that look professional. Your choice of paper and print method affects both cost and turnaround time, so decide this before you finalize the layout, since some templates are sized specifically for folded cards versus flat ones.
| Print Option | Turnaround | Best For | Approximate Cost |
|---|---|---|---|
| Home inkjet printer | Same day | Small quantities, last-minute needs | Ink and cardstock only |
| Local copy shop (Staples, FedEx Office) | Same day to next day | Higher quality paper, folded cards | $0.50 to $2 per card |
| Online print service | 2 to 5 days | Bulk orders, glossy or matte finish | $1 to $3 per card |
Home printing works fine for smaller services, but a copy shop gives you sturdier cardstock and a cleaner fold if you're distributing dozens at a wake or funeral.
Know your quantity and size
Finally, estimate how many cards you'll need. Funeral homes typically hand these out at the service, so count the attendees you expect at the memorial service you're planning and add a buffer of 20 to 30 extra for family members who couldn't make it. Standard obituary card sizes are 4x6 inches flat or a folded bifold around 5x7 inches when closed. Knowing your size ahead of time means you won't have to redo the layout after picking a template that doesn't match your paper stock. Once you have your details, photo, print plan, and quantity settled, you're ready to move into the actual template.
Step 1. Choose a free obituary card template
Once your details and photo are ready, the next move is picking a template that won't fight you later. Free obituary card templates come in a few flavors: basic word processor layouts, dedicated memorial design sites, and print shop template libraries. Not all of them are actually free once you try to export, so check for hidden paywalls before you invest time customizing one.
Where to find free templates
Start with tools you likely already have or that require zero signup friction. Canva's free tier includes obituary and memorial card layouts you can edit in a browser, and Microsoft Word or Google Docs both offer basic bifold card templates searchable right from their template galleries, the same sources compared in our roundup of free funeral program templates. Rememberingyou.online also lets you build a matching digital memorial page for free, which is worth doing alongside the printed card since the two can share the same photo and life story.
- Canva (free tier, browser-based, no download needed)
- Google Docs or Microsoft Word template gallery
- Local print shop's free design tool (Staples and Vistaprint both offer basic editors)
- A free memorial page builder, so your printed card and online tribute match
Match the template to the service style
Think about the tone of the service before you commit to a layout. A traditional Catholic funeral often calls for a template with room for a prayer or verse and a simple cross graphic, while a celebration-of-life gathering might suit a photo-forward design with warmer colors. Matching the template to the tone of the service now saves you from redoing the whole layout later when the wording feels off against the design.
Pick the template that fits the service, not the one that just looks nicest on a screen.
Avoid these template traps
A few common mistakes trip people up at this stage, usually because a template looks free until the export screen appears:
- Templates that only let you download a low-resolution or watermarked file for free
- Layouts sized for digital sharing only, not print (check for "print-ready" or DPI settings)
- Designs with fixed photo placeholders that crop faces awkwardly
- Templates requiring a paid plan just to change fonts or colors
Test the export function early, even before you finish customizing, so you know exactly what you'll get for free before you commit more time to the design.
Step 2. Add a name, photo, and important dates
With your template picked, it's time to fill in the parts that make the card recognizably theirs. The name, photo, and dates form the skeleton of any obituary card, so get these locked in before you touch the wording or colors. Most templates place these three elements in fixed zones, which makes this step fast if your details from earlier are already gathered.
Placing the name and title
Type the full name exactly as you'd want it read aloud at the service, including any suffix like Jr. or Sr. A clear name placement at the top or center of the card, in a larger font than the rest of the text, helps anyone glancing at the card immediately know whose life it honors. If they went by a nickname, add it in quotes or parentheses right after the legal name, the way many cards read "Robert 'Bob' Hensley." Keep the title simple: "In Loving Memory of" above the name works for nearly every religious background and tone.
Uploading and cropping the photo
Drop the high-resolution photo you chose earlier into the template's image slot, then check how the crop tool handles faces. Some free builders auto-crop to a circle or oval, which can cut off a hat, a hand resting on a shoulder, or part of a beloved pet sitting beside them. Drag the crop frame manually if the tool allows it, since a tight, centered crop on the face reads better on a small printed card than a wide shot with lots of background.

The name and photo are what people look at first, so get those two elements right before anything else.
Formatting the dates
List the birth and passing dates in a consistent format, either "March 4, 1948 - January 12, 2024" or the shorter "1948-2024" if the card is tight on space. Avoid mixing formats across the card, since a card that reads "03/04/48" next to "January 12, 2024" looks unfinished. If the family wants the funeral or memorial service date included on the same card, add it as a separate line below the dates rather than crowding it into the same sentence.
- Full name and nickname (if used)
- Birth date and city
- Date of passing and city
- Service date, time, and location (optional line)
Once these three elements sit correctly on the page, you're ready to add the words that actually tell their story.
Step 3. Write a heartfelt obituary or verse
Words matter more on a small card than anywhere else in the process, because you only have a few lines to say something true. A short obituary or verse gives the reader a feeling, not a full biography, so save the detail for a longer written obituary and resist the urge to cram in every accomplishment. Most cards work best with three or four sentences plus a closing line, whether that's scripture, a poem, or a simple statement of love.
Keep the wording short and focused
Think of the card text as a highlight reel, not a resume. Mention their role in the family, one or two things they loved doing, and how they'll be remembered, then stop. A tight, well-chosen sentence beats a paragraph that tries to summarize eighty years in one breath. If you're stuck, read the sentence out loud. If it takes more than one breath to say, trim it.
A card only needs a few honest sentences, not a full life story.
Choosing a verse or scripture
For Catholic and Christian families, a familiar verse often carries more weight than original wording. Psalm 23, John 14:1-3, or the Serenity Prayer all fit comfortably in the space a template usually leaves below the photo. If the family isn't religious, a favorite poem or a line the person used to say themselves works just as well. Here's a simple structure you can copy directly into your template:
In Loving Memory of
[Full Name]
[Birth Date] - [Passing Date]

[2-3 sentence life summary]

"[Verse, poem, or personal quote]"

Service held at [Location], [Date and Time]
Writing tips for the life summary
Gather input from a sibling, spouse, or close friend before you finalize the wording, since they might remember a detail worth including that you'd otherwise miss. Read the draft out loud to at least one other family member, because typos and awkward phrasing are easier to catch by ear than by eye. Once the text feels right, resist editing it again and again. Overworking a short passage tends to strip out the warmth that made it feel personal in the first place.
- Keep the summary to 2-3 sentences
- Choose one verse, poem, or quote, not several
- Read it aloud before finalizing
- Ask one family member to review for tone and accuracy
Once the wording feels honest and complete, move on to how it looks on the page.
Step 4. Customize colors, fonts, and layout
Now that the words are set, turn your attention to how the card looks as a whole. Colors, fonts, and layout shouldn't distract from the name and photo you already placed carefully, so treat this step as polish, not redesign. Most free template tools let you adjust these three elements independently, which means you can experiment without breaking the structure you already built.
Pick a color palette that fits the tone
Stick to two or three colors at most, and lean toward muted, warm tones rather than anything bright or festive. Soft blues, sage greens, cream, and dusty rose all read as respectful without feeling cold. A restrained color palette keeps the focus on the photo and text instead of competing with them for attention. If the family has a favorite color the person always wore or a school color tied to a lifelong passion, weaving that in as an accent gives the card a personal touch without overwhelming it.
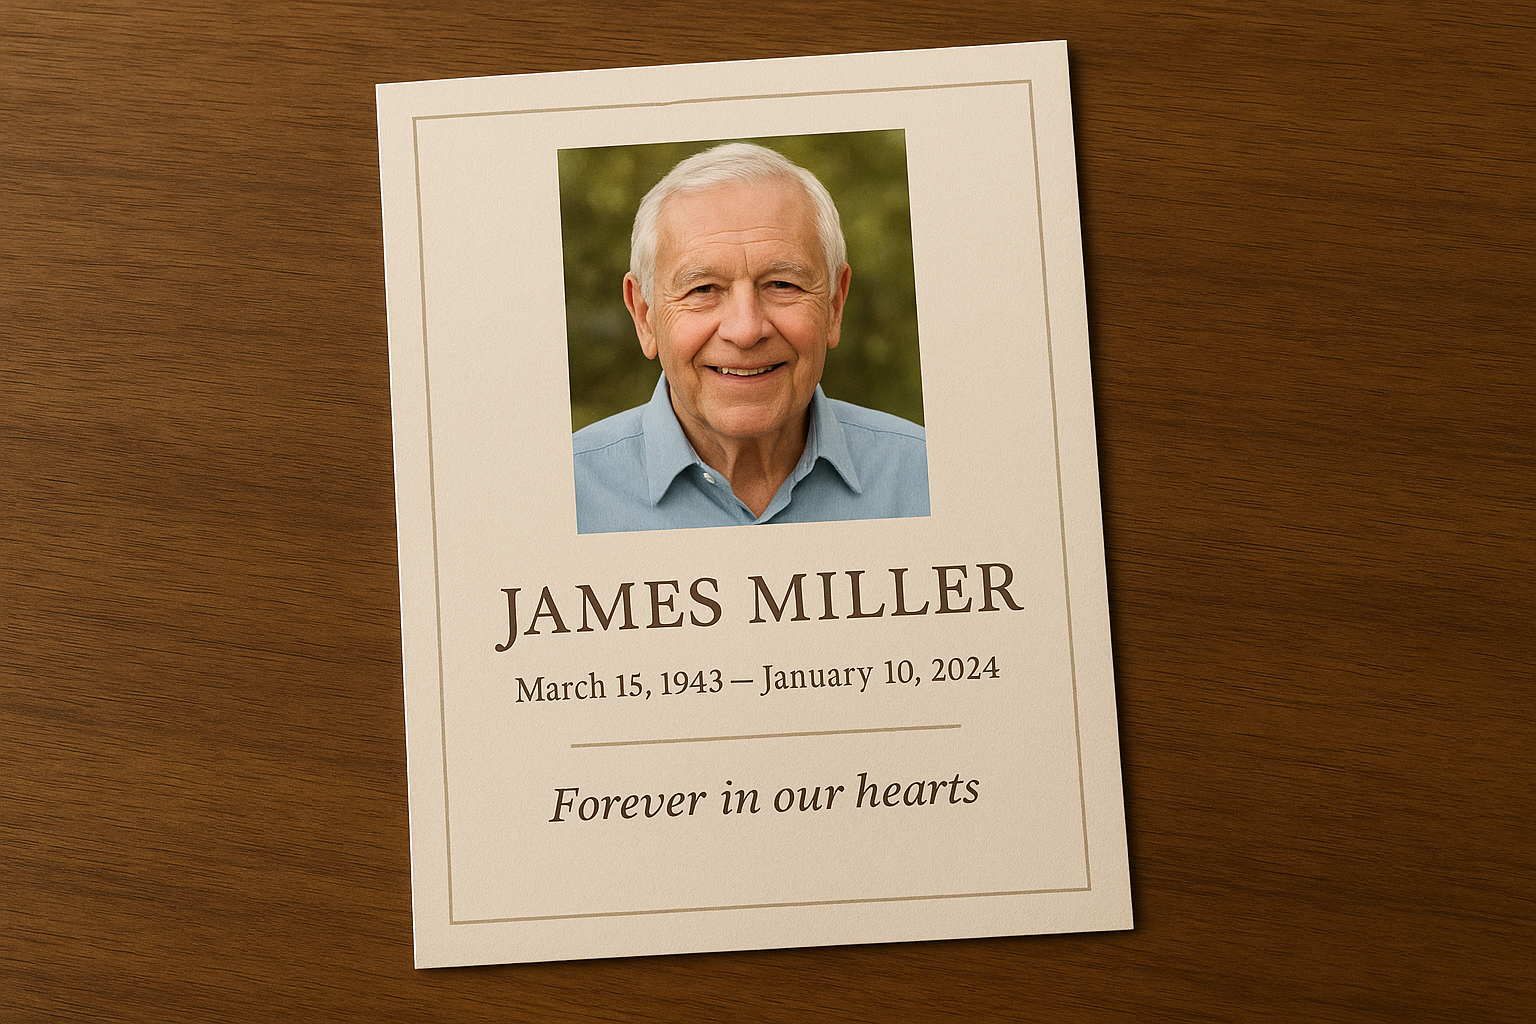
Simple, muted colors let the photo and words do the work, not the design.
Choose readable fonts
Avoid script or cursive fonts for the body text, even though they look elegant on a screen. They get hard to read once printed small, especially for older relatives who'll be holding the card at a wake. Reserve a decorative font, if you use one at all, for the name only, and keep everything else in a clean serif or sans-serif font like Georgia, Garamond, or Open Sans. A legible font choice matters more once the card is printed and held at arm's length than it does while you're zoomed in on your screen during editing.
Adjust the layout for balance
Check that there's enough white space around the photo and text so the card doesn't feel cramped. A few adjustments make a noticeable difference:
- Center the photo and name, then align the body text left or centered underneath
- Leave equal margins on all four sides, roughly a quarter inch minimum
- Keep the verse or quote near the bottom, separated by a thin line or extra spacing
- Avoid stacking more than three font sizes on one card
Once the layout feels balanced and nothing looks squeezed or lopsided, step back and look at the card as a whole, not element by element, before moving on to proofreading.
Step 5. Proofread and preview your card
Before you spend money printing dozens of copies, slow down and read the card as if you were a stranger seeing it for the first time. Proofreading a memorial card matters more than proofreading almost any other document, because a misspelled name or a wrong date on a keepsake can't be quietly fixed once it's handed out at a service. Most free template tools let you zoom in or toggle a full preview mode, so use that before you touch the download button.
Check the details that are easy to miss
Names and numbers hide mistakes better than sentences do, since your eye tends to skim over them as correct. Run through this list slowly, checking each item against your original notes rather than trusting memory:
- Spelling of the full name, nickname, and any surviving family members mentioned
- Birth date and passing date match official records exactly
- Service date, time, and address are current, especially if the venue changed recently
- Verse or quote is copied word for word, punctuation included
- No leftover placeholder text like "[Insert Name]" hiding in a corner
A typo on a printed keepsake can't be quietly fixed later, so catch it now.
Preview at actual size, not zoomed in
Most editors default to a zoomed-in view that makes small text look larger and more readable than it will be on paper. Switching to actual size in the preview mode, or printing a single test copy on regular paper, shows you exactly how the finished card will read in someone's hand. Fold a test print if your template is a bifold design, since text near the fold line sometimes gets swallowed or looks off-center once the card closes.
Get a second set of eyes
Ask one other family member to read the card out loud to you, since hearing it read aloud catches phrasing you've grown numb to after staring at it for an hour. Someone outside the immediate planning also tends to notice small things you'd overlook, like a grandchild's name spelled with the wrong middle initial or a service time that conflicts with what's on the funeral home's own printout. Send a phone photo of the preview to a sibling or close friend if you can't sit down together in person, and wait for their reply before finalizing anything.
Once the wording checks out and the layout holds up at real size, you're ready to move from screen to paper.
Step 6. Download, print, or share the card
Once the proof looks right, it's time to turn that screen design into something you can actually hand someone. Downloading the finished card is usually a one-click action in most free builders, but the file format you choose determines how well it prints and whether you can email it to relatives who live too far to attend in person. Pick PDF whenever it's offered, since it locks the layout in place and prints consistently across different printers and copy shops.
Choosing the right file format
Most template tools give you a choice between PDF, PNG, or JPG when you export. Each one behaves differently once it leaves the screen:
| Format | Best For | Print Quality | Shareable by Email/Text |
|---|---|---|---|
| Copy shops, home printing | Highest, stays crisp at any size | Yes | |
| PNG | Digital sharing, social posts | Good, but text can blur if resized | Yes |
| JPG | Quick previews, texting | Lower, compresses on repeated saves | Yes |
Choosing PDF over PNG or JPG avoids the compression artifacts that sometimes creep into printed text, especially around small fonts near the fold line.
Printing at home versus a copy shop
Grab the print settings from earlier in your planning and match them to your file. If you're printing at home, set your printer to the actual cardstock size rather than letting it auto-scale, since auto-scaling often shrinks margins unevenly. For a copy shop run, bring the PDF on a USB drive or email it directly to their print desk, and confirm they're using cardstock, not standard paper, before they run the full batch.
Always request one printed test copy before approving a full batch order.
Sharing the card digitally
Not every relative will hold a paper card, and that's fine. Text or email the PNG version to family who live overseas or can't travel for the service, so they still have something to keep even if they can't attend in person. Sharing the digital file this way also gives you a backup copy in case the printed cards run out at the wake, and it means anyone can reprint it later at home if they want their own keepsake. Once your cards are printed and shared, there's one more step worth taking: connecting that same story to a page people can revisit long after the service ends.
Step 7. Link the card to an online memorial with a QR code
A printed card only holds a few sentences, but grief usually needs more room than that. Setting up a full online memorial page and printing its QR code on the card gives anyone holding that keepsake a way to see more photos, read the full life story, and leave a message, months or years after the service ends. Building the memorial first means you'll have a link ready before you finalize the card layout, so the QR code isn't an afterthought squeezed into a leftover corner.
Creating the memorial page
Head to Remembering You and set up a free account, no credit card required. Reuse the same photo, dates, and life summary you already wrote for the card, then expand on it with a fuller biography, a timeline of their life milestones, and additional photos or videos that wouldn't fit on paper. The platform also includes a shared guestbook where out-of-town relatives can leave a memory, plus virtual candles and a prayer intentions board for Catholic and Christian families who want that option.
A QR code turns a small paper card into a doorway to an entire life story.
Adding the QR code to your card
Once the memorial page is live, Remembering You generates a unique memorial QR code you can print for it automatically. Drop that code into your template near the bottom of the card, close to the verse or closing line, at a size no smaller than half an inch square so phone cameras can pick it up without trouble.
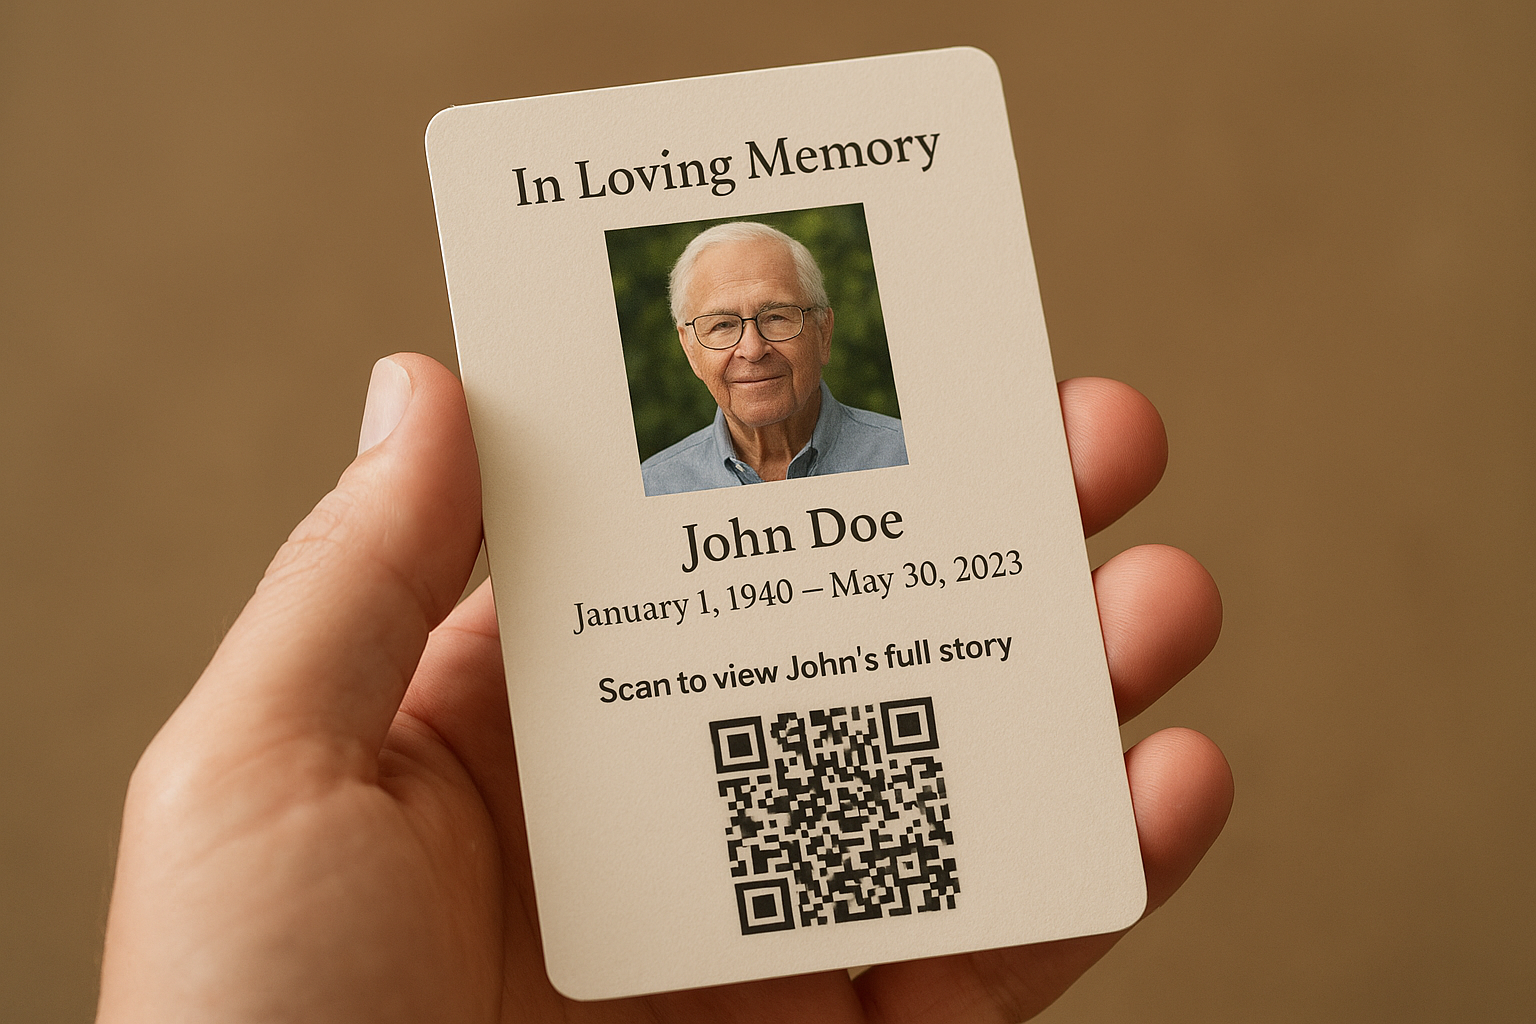
- Place the QR code where it won't get folded or creased
- Add a short line above it, like "Scan to view [Name]'s full story"
- Test the code with your own phone camera before printing the full batch
- Keep the code high-contrast (dark code on a light background) so it scans reliably
Why this matters after the service
Cards get tucked into wallets, Bibles, and photo albums, and most people don't look at them again for years. A working link on that card means the memory doesn't stay frozen at one funeral date. Family can keep adding photos to the memorial page long after the wake, and the one-time $24.99 lifetime upgrade unlocks every feature permanently, with no subscription to forget about later.
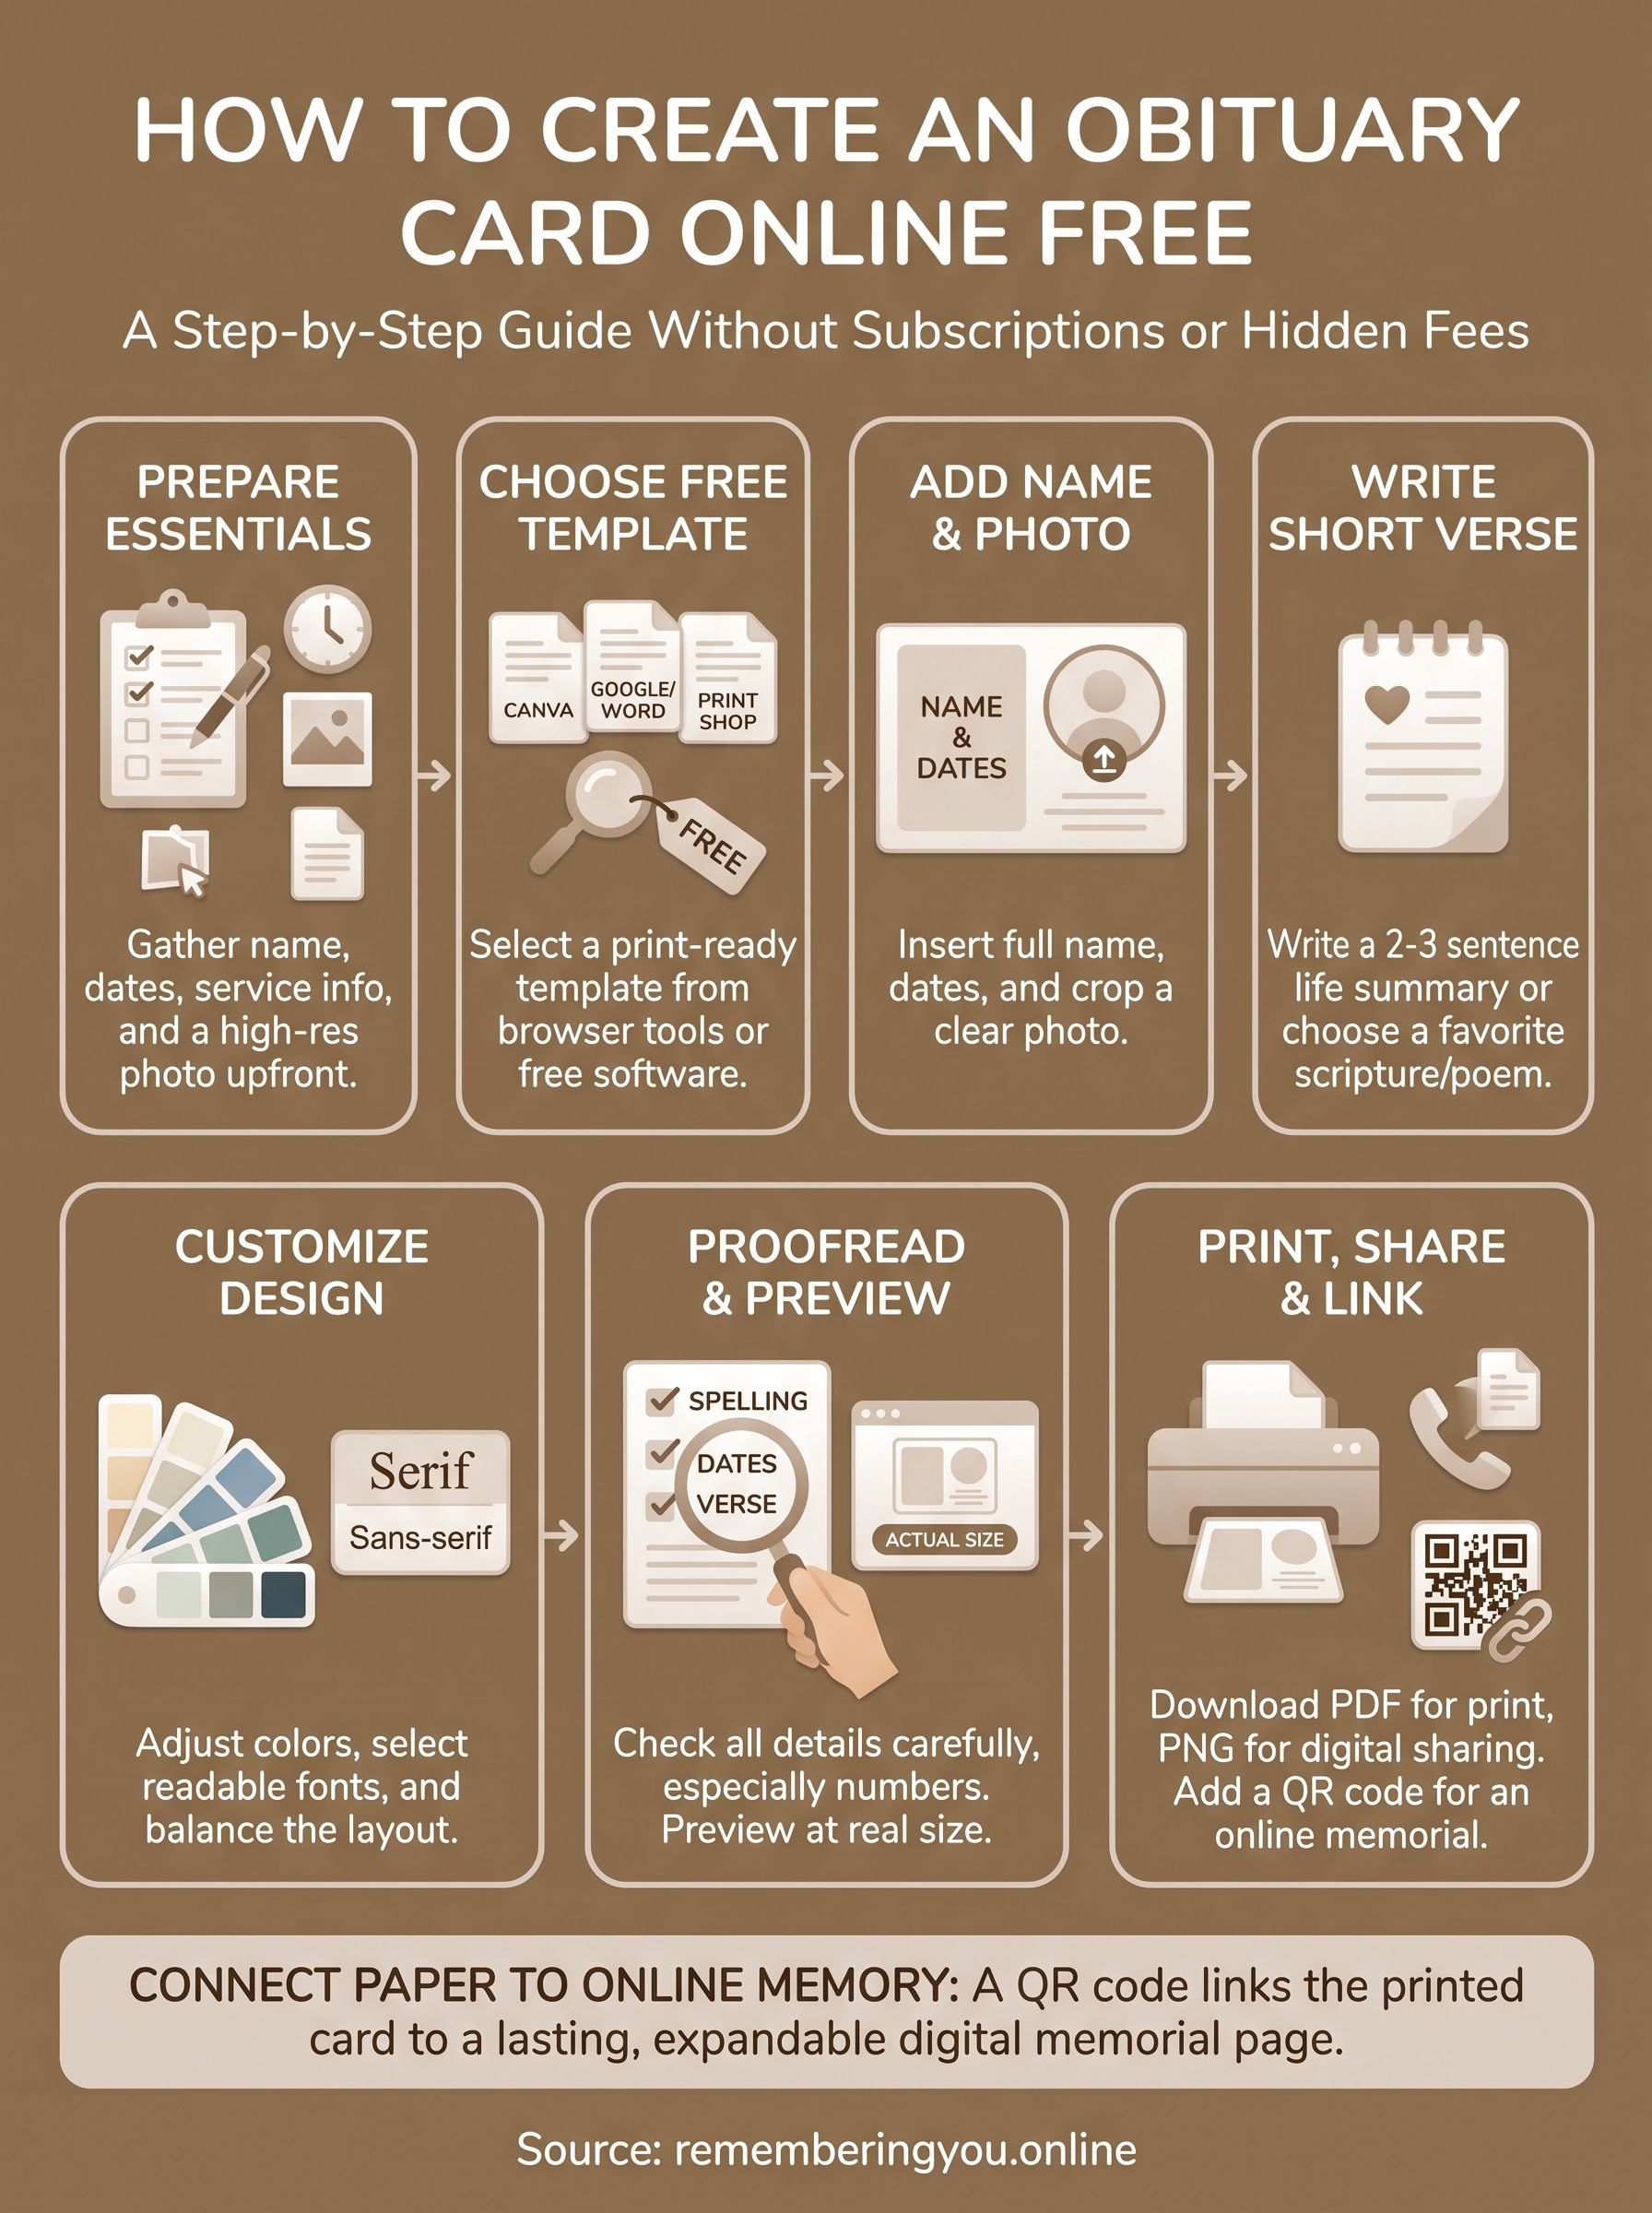
A simple way to honor their memory
You don't need design software or a budget to give someone a proper send-off on paper. Gather the details, pick a template, fill in the name and photo, write a few honest sentences, and print. That's the whole process to create an obituary card online free, no subscriptions or watermarked exports required.
What makes the card last, though, is the link behind it. A paper keepsake fades, gets tucked in a drawer, and eventually gets forgotten, but a QR code tied to a full online memorial keeps growing as family adds photos, stories, and messages for years to come. Zero cost to start, one small upgrade if you want every feature unlocked for good.
Print the card today, then give it somewhere to point. Set up a free digital memorial page and give the people who loved them a place to keep coming back to.